This week we will be showing the classic all-in tactics for GDI, ZOCOM and Steel Talons. Remember that an all-in tactic is either a win or a loss, so be sure that the odds are well in your favor of rushing.
GDI is much, much different from Nod in the rush methodology. Nod players can easily spam bikes and perform a successful rush, but GDI can't spam Pitbulls for the same effect. Of course this doesn't mean GDI can't do ninja tactics of its own. APCs, Pitbulls, Orcas and Missile Squads are the equivalent of Bikes, Buggies, Reckoners and Scorpions, in some instances even better. However, the key thing to remember when going all-in for GDI is that you need to double check your economy's safety first because you don't have the privilege of stealthed harvesters like Nod and Marked of Kane do.
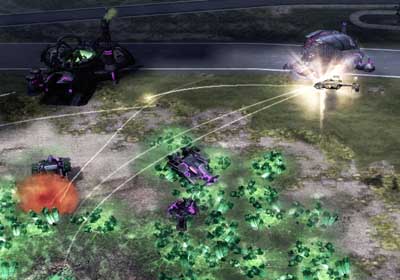 Sacrificing your Orca to take down a harvester is a good trade off.
First and foremost scout whilst anti-scouting. A single enemy scout can lead your rush to ruins so you will need to make sure those enemy infantry don't get through. Luckily all GDI are well-suited for both tasks due to their fast Riflemen Squads and foxholes.
A good opening build order would be Power Plant > Barracks (2 Riflemen + Engineer then sell) > Draft Watch Tower > 3 Foxholes. A bit expensive for early game but this will ensure your enemy has no clue what you're doing.
Secondly you have to decide between a War Factory or an Airfield. This comes down to your play style: if you like firepower and mobility for more risk then go Airfield, or if you want quantity over quality go for a War Factory. Deciding on a War Factory gives you the added bonus of rebuilding your MCV but you could lose either way, so there are a lot of factors to consider.
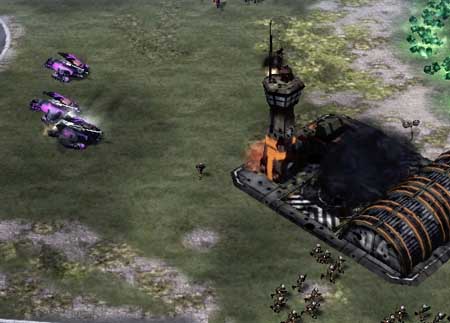 Always be prepared to retreat and defend your base.
The tricky bit is keeping the flow going. Personally I like to go with a healthy mix of Missile/Missile APCs or Wolverines when using a War Factory simply because they're all well-rounded killers. Airfield rushers have it much easier: Radar Scan his Tiberium field and then lay siege to his harvesters with Orcas and Bloodhounds. The only real choice you have is to decide whether you go right for the Harvesters or anti-air first; most of the time targeting the Harvesters is better.
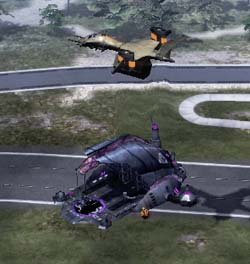 Sneaky Engineer tactics are a must.
Finally try to mix things up a bit and spread confusion in his base. Steel Talon War Factory rushers can build a Titan or two to flank the enemy War Factory from behind and trample vehicles as they pop through. Airfield players can airlift Engineers next to key structures using Call for Transport or use the $500 Orca strike to slap health off enemy buildings. In any case, make sure you have a suitable force to fuel your rush, or else it could come tumbling down.
Summary:- Scout and Anti-Scout - Use your fast Riflemen to see what you're up against and foxholes to stop any trespassers.
- Selling your MCV - That extra $1750 cash and Engineer can be very useful, but be prepared to fight without a radar or base defenses.
- War Factory or Airfield - Unless your vehicle micro is on top I recommend going for the Orcas as they kill harvesters with minimal effort.
- Martyrdom - Sacrificing two Orcas to take down a Harvester can be a very good investment.
- Back to Base - A rogue team of Pitbulls/Bikes/Seekers can stop your rush in its tracks, always be prepared to retreat for a quick defense.