As well as new gameplay aspects, Red Alert 3 brings back another key mechanic within some of the old Command and Conquer games: the Wall. Keep in mind, this addition should not allow us to neglect correct building placement. Far more crucial than some would believe, it is debatable that placing buildings correctly is a key factor in winning games. All three factions have different aspects of building placement & below we'll take a look at some of them.
Allies
With fast build times, a huge build radius & multiple vehicle repair structures the Allies have an enormous array of strategic building placements throughout the Ranked maps of Red Alert 3. An example of utilizing the Allies MCV Build Radius is a common placement among high level play used on Industrial Strength in which the Barracks is placed on the furthest South-Eastern (Or North-Western if you are in the south) point of the build radius. This is capable of getting units in to the center of the map for Garrison control & Oil Requisitions.
Using this, it is possible for Allies to gain significant map control throughout the game without losing too many units for non cost-effective garrison clearing. Also, this allows you to come on to your enemy with strong early harassment. In either case, it is an effective initial build. Of course, not all maps garner such a unique advantage but Allies Radius is not something to be taken for granted; the few spaces that it does give should be used to put your early output structures as close to your goals as possible, never build Barracks or War Factories in the centre of your base unless you have a significant reason to do so, in particularly in the early stages of the game, early scouting & harassment is important in Red Alert 3 and you should take every benefit you have to gain the upper hand.
For repair structures the Allies also have the bonus of having three different structures which offer unit repair: the Airfield, the Naval Yard, & the War Factory. With this benefit you have three major strategic choices with Allies; place the structure close to a refinery, giving your Prospector consistent repair making it very resilient to light harassment.
Don't bug out your Collector!
Placing the Repair Structure one block away from the Refinery will prevent the Prospector from halting it's harvesting, this will also allow it a quick getaway if need be; it can circle the structure avoiding any harassment.
Secondly, for Allies you may wish to have your Repair structures as close to the edge of your base as possible, so that if a large strike force attempts to break your defenses you will be utilizing the repair drones while your own forces are defending your base. This is not wise with an Airfield however as these are key structures that your enemy will aim to destroy. (Though in some cases this can also be helpful for other reason, like air unit travelling time for example)
Finally, the Allies use of Structures is more than just repairing units. Allies Tech relies solely on upgrading your prospectors, which are easily destroyed and become prime targets if your enemy notices that they are of a high tier. An alternate option is to only upgrade the more resilient MCV, although both have downsides. If you rely on your MCV for tech then you will have a hard time expanding effectively as a result and only mid to late game should your MCV stay in a single location for a prolonged time. To counterbalance this, careful placement of structures may also be necessary to carry over Tech upgrades from one location to another:
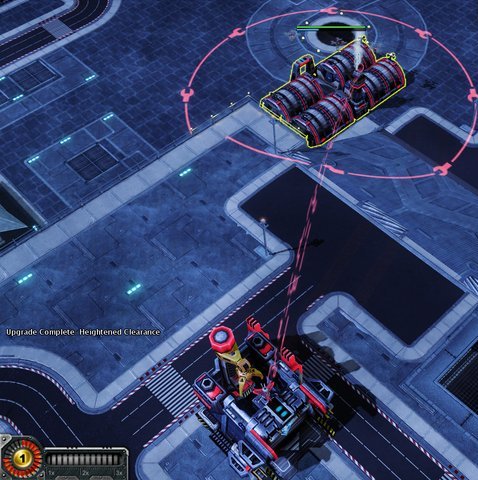 Predetermined build location allows the MCV to expand whilst keeping Tech level for the airfield
 The Airfield was purposely built in this location so that when the MCV moves forward to expand the Airfield can still benefit from a higher tech, though Airfields can be easily replaced utilizing this with more costly structures like the War Factory can benefit in a number of ways, and you save not only money, but also build time. It is also wise to note that, though the MCV is restricted to building on Terrain of the same elevation as itself, Tech upgrades are not restricted by this, so a building on a lower terrain level may still benefit from the MCV's Tech level.
Soviets
The Soviets capability for aggressive expansion and universal teching makes them highly suitable for both good placement of base defenses and the capability of hiding important structures effectively. Their lack of Auto Repair within their output structures are counterbalanced by the highly versatile Crusher Crane. Offering a second build queue and a huge repair radius, it is a good early game strategy as well as a reliable mid - late game addition if only to repair your forces.
Placing the Crane effectively is not difficult to comprehend, placing it nearby the front side of a Refinery will allow your Harvester a speed repair as well as a quick repair depot for your forces on the outside (Using wall to safely block your harvester from assault). This also allows you to quickly refund your Harvester if it is under heavy assault from air or ground forces and is incapable of surviving. (For example if a Cryo-Copter has come along and you have no hope of preventing it from taking its toll in time)
 Should your refinery get destroyed you are safe in the knowledge that you have two build structures, securing a fast rebuild. A Crusher Crane will also allow you to move your MCV freely.
 To further benefit from the Crane, build your airfield in close proximity to it to give your air units quick repair when they are docking & reloading, however keep in mind that structures bunched up are very vulnerable to the Allied Timebomb and other area-of-effect damage.
The Soviets other unique building point is base defenses. Thanks to their array of different types of base defense and early availability of advanced defenses, placing them correctly can thwart any number of attacks.
 A cheap build capable of defending both of your refineries, walls on outside to prevent outside harassment. This can also be replaced with a Crane for repairing both refineries.
For sea expansions a single Tesla coil can prevent most light harassment from sea units. As it is capable of hitting submersible units it can even get the early assault on them. If your opponent is utilizing air heavily then the Flak Canon is both a resilient and powerful deterrent for any harassment by slow moving air units. However you should never solely rely on static defenses; given time they will always be broken down and beaten.
Sneaky placement
Keeping in mind the default battlefield view, building a Flak Canon directly behind your MCV can leave your opponent scratching his head while he figures out where the AA fire is coming from.
As a final note, as Soviets, though you have the downside of your opponent seeing your structure being built you can also use this to your advantage. Placing an Airfield in front of your enemys forces can buy your precious time to recoup your own defenses. To further benefit from this immediately halt production; you have now given yourself a high health barrier for a small fraction of cost. Combining this with expensive and highly targetable structures like the Battle Lab can throw your enemy off guard with the idea he is doing heavy damage to your economy by destroying the structure.
Empire
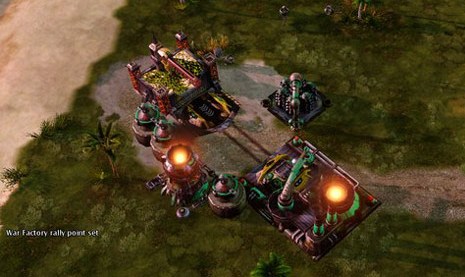
 A showcase of the instant repair you can give a Harvester by careful placement of a War Factory.
With undoubtedly the most unique building style in the Red Alert 3 universe, the Empire also have a great deal of stealthy tactics they can utilize to ambush their opponents, in some cases with very powerful units. Like the Allies, with addition of auto repair buildings they have the benefit of repairing units without the restriction of a binding build radius. This allows you to place a Mecha Bay at any of your refineries should you feel they are vulnerable for attack. Coupled with the Dual Cannons & circling the Mecha bay, the Harvester alone becomes well capable of defending against light harassment, at least until reinforcements come to assist.
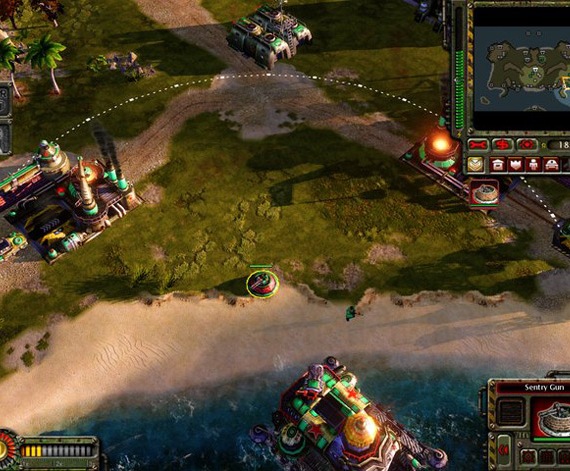
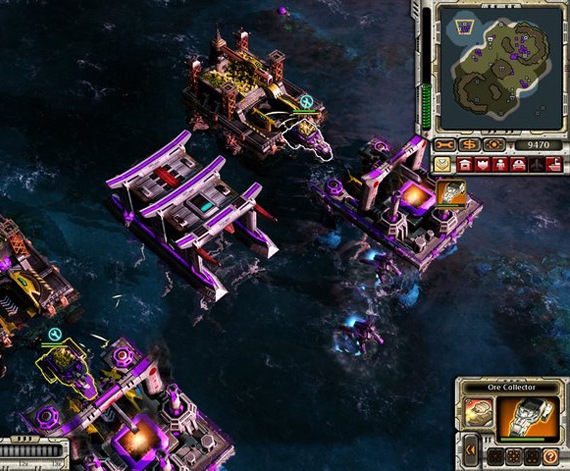 Displaying how a single Dock is capable of repairing two Refineries on Industrial Strength
People often forget that Empire has no restricted build radius, with this in mind securing Oil Derricks can be easily done by sending two Dojo Cores to the nearest Derrick & deploying one whilst using the other to prevent dogs or bears from camping, this may sound difficult, but once you have a few Imperial Warriors out you are easily safe to capture the structure. Tech level is also not restricted by any radius. By constructing a refinery you are capable of reaching tier 2 and with a mainframe you are capable of reaching tier 3. With this in mind teching up structures in obscure and unexpected locations can offer huge results in terms of surprise attacks. However, you must be cautious as failing to keep the structure hidden can make it a vulnerable and prime target if spotted.
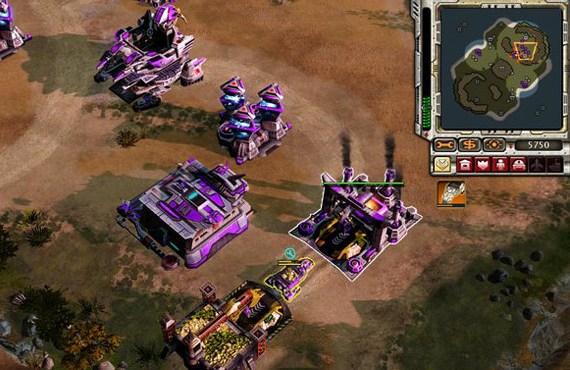
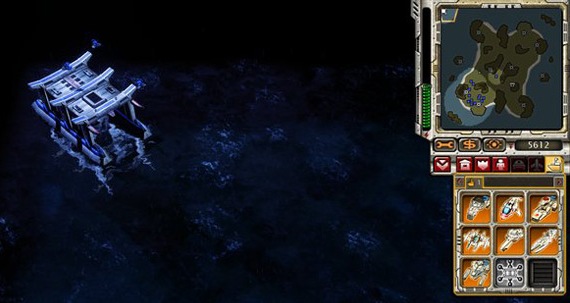 By checking the map it is easy to assume that this tier 3 Docks could be missed by your opponent. It is built close to the enemy base and is able to construct some of the most devastating units in the game. If left unchecked; it can be a real game changing structure.
In closing, by simply paying attention to where you place your structures you can ensure a fast repair or surprise assault which could assist in turning the tide of battle.