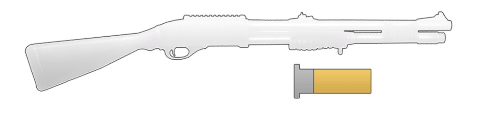
12 Gauge Slugs, from here on in are referred to as slugs, so don't be confused by the mention of molluscs. They are an often overlooked specialisation that equips any shotgun in the game (excluding the 40mm shotgun) with, what else? 12. Gauge slugs. Slugs are solid projectiles that were originally invented for hunting large game, but were quickly modified for military purposes. In Bad Company 2, shotguns slugs can be used to add range to the shotguns, which are otherwise limited to short range combat. This guide will cover the maths behind slug use in all situations, as well as detail in-game tactics and tips for those who wish to master the delicate art of 'slugging'.
Specialisation Effects
12 Gauge Slugs are available to all kits and occupy Specialisation Slot 1 on your load out screen, they are unlocked when the player reaches level 16. It affects all shotguns, with the exception of the 40mm shotgun attachment for assault rifles, and increases their range onto infinity, the same as all other weapons in the game. However, this comes at a price. Slugs are singular projectiles, and therefore accuracy is required in order to hit a target. Luckily, the cross-hairs are changed to a standard cross when the player opts for the specialisation. Also, the damage done by the slug is significantly less than is done if all the pellets hit.
Now, the observant among you may have noticed that the negatives of slugs (need for accuracy and less damage) appear to outweigh the positives (increased range). However, consider how often you hit an enemy with every pellet, or how many times that pesky Engineer has been able to pew-pew you to the ground from anything further than a few meters away. The true appeal of shotgun slugs comes in the fact that you become effective at all ranges. Whether you need to remove a sniper from a hill or clear a building of a belligerent assault squad you'll be able to effectively complete both tasks.
Fun Fact: Shotgun slugs are tied to the weapon, meaning that if you steal someone's slug-equipped shotgun then you'll also have slugs, even if you don't have the specialisation.
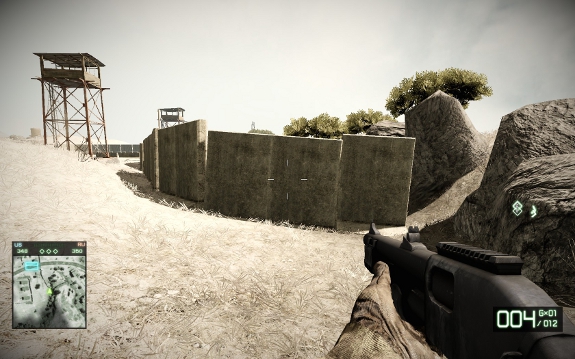
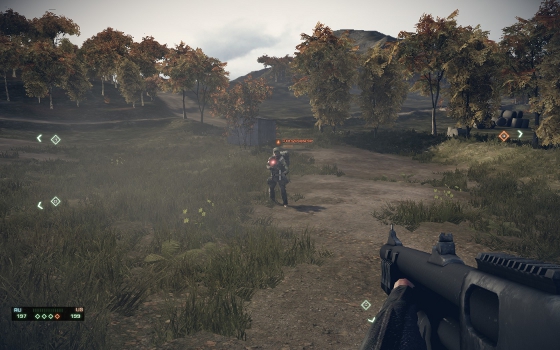
Let's take a look at what equipping Slugs does physically to the effected shotgun. This picture shows what the default crosshairs (unzoomed) looks like:
As you can see, the crosshair becomes the standard crosshair of weapons in the game. Firing a sabot shotgun with this crosshair is somewhat inaccurate and should be avoided as much as possible. It's not to say you won't hit the target firing from the hip due to such a wide spread, you just won't hit the target as accurately as the next method.
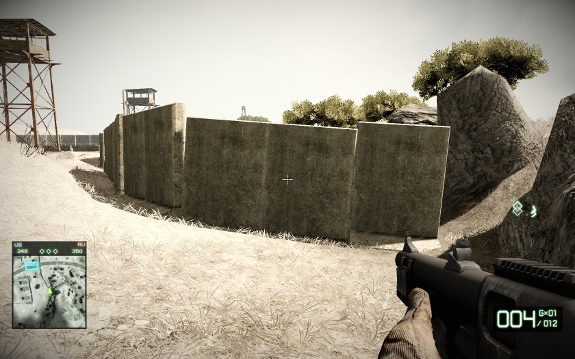
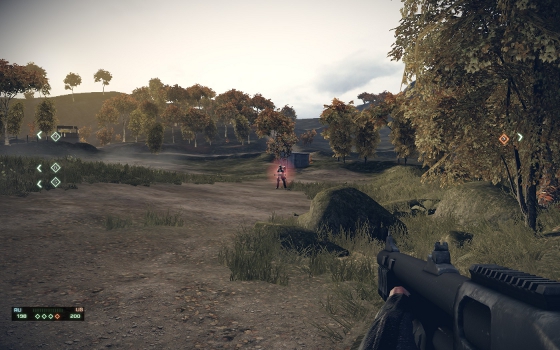
Now let's see what the crosshairs look like zoomed:
As you can very well see, above is an extremely accurate crosshair for a shotgun. Firing zoomed with slug rounds is the most accurate way to use this specialisation. Another advantage of zoomed slugging is that you incur no movement accuracy penalties whilst zoomed, which means firing at the enemy whilst moving into cover is an extremely feasible tactic when using this specialisation.
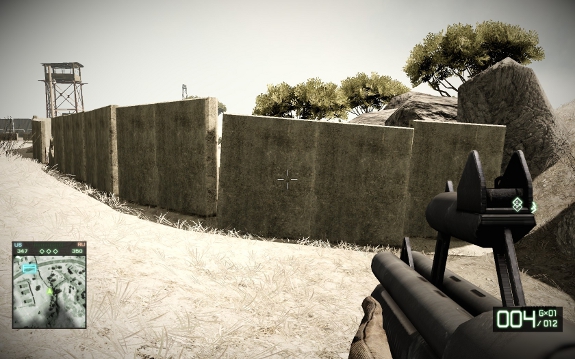
This picture shows the Neostead 2000 zoomed with slugs. Though it may have a wider crosshair when zoomed, it does makes up for it but we'll get to that later on.
Specialisation Usage 'So dizzy,' you ask, 'how can I too become a pro with the shotgun slugs?' Well my child, fear not, as the swap to slugs really isn't as scary as you may think. But before we jump the gun and start popping enemies left, right and center, we need to first understand the weapon we're using.
As any regular shotgun user will know, shotguns can be roughly divided into two groups: Pump-action and Auto/Semi-auto (A/S-A). The 870 Combat, Neostead 2000 and SPAS-12 all fit into the first group, with the Saiga 20k Semi and USAS-12 Auto taking up the latter. Pump-action shotguns are defined by their more powerful shots (and subsequently, larger recoil) and the need to manually pump the gun between every shots. They also have longer reload times than the auto/semi-auto shotguns due to the user having to load each shell, or slug in our case, into the gun. Auto/Semi-auto shotguns are, as the name would suggest automatic or selective fire weapons and loaded using a box magazine. However, this increase in rate of fire is counter-balanced by a lower damage per shot than the pump-action weapons. To give a proper comparison of the two weapon types below is a list of the two weapon types and their effective ranges in a variety of situations.
Pump-Action 100 damage from 0-10m, dropping off linearly to 50 damage at 36m
Without Magnum Ammo
Target:
Without armour 1 shot up to 10m
With armour 2 shots up to 28m
Magnum Ammo
Target:
Without armour 1 shot up to 20m
With armour 1 shot up to 10m
Auto/Semi-Auto 39 damage from 0-8m, dropping off linearly to 28 at 64m
Without Magnum Ammo
Target:
Without armour 3 shots up to 36m
With armour 4 shot kill up to 46m
With Magnum Ammo
Target:
Without armour 3 shots at all ranges
With armour 3 shots up to 36m
So these are the mathematical calculations on how the weapons should perform, now let's take a look at some tested in-game stats, courtesy of myself and Zm0r. All of these were tested on a target without body armour and with shots to the upper chest. However, this is only meant to be a rough guide due to the impracticalities of working out your range in the heat of a fire-fight. The real purpose of this part is to help the reader pick their fights and not try to engage an enemy they can't kill without a reload or something similar.
Here's a visual representation of the ranges and their damage values: 10m
Pump-Action at 10m Without Magnum Ammo
1 shots
With Magnum Ammo
1 shot
Auto/Semi-Auto at 8m Without Magnum Ammo
3 shots
With Magnum Ammo
3 shots
25m
Pump-Action Without Magnum Ammo
2 shots
With Magnum Ammo
2 shot
Auto/Semi-Auto Without Magnum Ammo
3 shots
With Magnum Ammo
3 shots
50m
Pump-Action Without Magnum Ammo
2 shots
With Magnum Ammo
2 shot
Auto/Semi-Auto Without Magnum Ammo
4 shots
With Magnum Ammo
3 shots
100m
Pump-Action Without Magnum Ammo
2 shots
With Magnum Ammo
2 shot
Auto/Semi-Auto Without Magnum Ammo
4 shots
With Magnum Ammo
3 shots
So, as you can see, magnum ammo is fairly useless when applied to the pump-action shotguns, as it only reduces the amount of shots needed at short range (up to 20m assuming the target doesn't have body armour). However, magnum ammo is a definite contender for best choice on A/S-A shotguns, which coincidentally leads me happily on to...
Specialisation Conjunction
First of all, let's think of the specialisations available to us. We obviously can't take a first slot specialisation, and our gadget is entirely dependent on our class (more on this later) which only leaves the second specialisation slot as a way of really customising our character. The four second slot specialisations available to us are; Magnum Ammo, Ceramic Body Armour, Extended Shotgun Magazine and Explosives. Below, Zm0r details his advice with regards to setup and specialisation choice.
Magnum Ammo Magnum Ammo is the specialisation you are looking to use when equipped with the USAS-12 or the Saiga 20k as taking it will reduce the number of round you'll need to send far off enemies to the ground. The Pump-Action shotguns will not benefit so much, although it can still be a viable choice if you're fighting on maps such as Oasis, where you may need the added one-shot range to drop enemies running out of alleys or across streets, which you may only have time to hit with one shot. It can also come in handy if you have the misfortune of running into enemies with Ceramic Body Armour, as the added damage can mean the difference between dropping an already hurt guy and him living to fight another day.
Also, consider the fact that Magnum Ammo will affect your side-arm as well, meaning you can use slugs to take a huge lump off of the enemies health and then a couple of pistol shots to drop them, forgoing that irritating pump action that follows every shot. Also, unless you're engaging targets at long range Magnum Ammo will be fairly useless, as you'll still require the same number of shells to drop a target all the way out to 50m.
Ceramic Body Armour When using a pump-action shotgun, this is probably the best specialisation you should take. It increases your health by 25%, which can make a huge difference in a fire-fight. The reason it works so well with slugs is that it means you can engage enemies at medium-long range and shrug off return fire, but still fight efficiently against other shotgun users or SMG users at close range, where your weapon will still cause a one-shot kill. Using it on an Auto/Semi-Auto shotgun may not be so fruitful, but that added 25% health is always welcome. This is my personal favourite specialisation to use with a pump-shotgun as it gives you the opportunity to survive unpleasant situations and can save you from your own mistakes (such as missing a shot). It's especially on maps where you often find yourself fighting at medium ranges, as it gives you more of a chance to pull off that second shot. Taking Body Armour is really a win-win situation as it will cover for competent and less able players equally and will always provide you with a 25% increase in health, regardless of your weapon or class choice.
Fun Fact: The Neostead 2000 has a slightly wider cross-hair when zoomed in, meaning that it is less accurate at longer ranges. This is made up for though by the weapon's drastically faster reload time in comparison to the other pump-action shotguns.
Improved Demolitions Improved demolitions is a class dependent choice. Seeing as I personally prefer to use Assault, improved demolitions is simply not a worthwhile option, because you have an unlimited supply of grenades and C4, so you can always just use another explosive just to make sure, a potential choice, but there are better options.
Added note from dizzy: For those of us who don't where a balaclava and goggles to work, Improved Demolitions can be a more viable option. However, bear in mind that due to your limited amount of explosives; placement and correct usage becomes critical. The sad truth is, Improved Demolitions does not a better slugger make.
Extended Shotgun Magazine Unless you opt for a Saiga 20k or a USAS-12, the Extended Magazine specialisation is bordering on useless. For those using those weapons it can be a rewarding option, meaning you can afford to miss more and still stay in the fight. However, Magnum Ammunition may still be a better option if you often find yourself engaging targets at long range.
Class Setups
Okay, so we've looked at the maths behind our weapon and evaluated the best choices for our specialisations, now it's time to apply these two classes and battlefield situations. Below follows a few recommended setups and some tips we hope will help you on your way to 12-gauge-heaven.
Zm0r's Pump-action wonder
Assault Class
870 Combat
M1911 or M9
12. Gauge Slugs
Body Armour
Vehicle Armour
Due to the limitations of the pump-action shotguns; their small clip sizes and long reload times, the player is best of engaging enemies from their flank or from a location that is easily defended. The 870 is the best pump-shotgun to use, as it has pinpoint accuracy when zoomed (unlike the Neostead 2000) and takes up very little of the screen (unlike the SPAS-12). The Neostead can still be a viable option, as it has a significantly shorter reload time and the increase in spread will only matter at the more extreme ends of the weapon's range. The M1911 is there to ensure you can quickly drop targets at longer ranges. Fire one shot with the 870 and then finish them with your side-arm. The M9 can also work well as it has less recoil and faster shots, meaning you can make up for poor accuracy with simply volume of fire. Body Armour means you're more likely to escape if the enemies discover/overwhelm you, and Vehicle Armour is just for those times when you feel like being nasty and stealing the enemy's vehicles. Remember, playing as Assault means you have an unlimited supply of shotgun shots, C4 and grenades, so don't be afraid to clear a suspicious room with a grenade, or blow down a problematic wall with your C4. Just remember to play as a team player and place the ammo boxes in areas that will benefit everyone.
Dizzy's Faux Rifle Class
Recon or Assault
Saiga 20k
Any side-arm you feel comfortable with
12 Gauge Slugs
Magnum Ammo or Extended Magazine
Any Vehicle Specialisation
This class is really designed for those of us that are simply not satisfied with the M14 and M1 Garand's inefficiency at close range, but love using semi-automatic rifles. The most accurate description of the Saiga I could find comes from Dan7, who, in his weapon guide, described it as; 'a close range sledge hammer'. Now, whilst equipping yourself with slugs detaches from this slightly, the Saiga remains a powerful weapon at close range but, with slugs, is capable of competing with the M14 and M1's killing power at long range. The lack of iron sights can be viewed as both a positive and a negative, as despite the lack of zoom, the weapons are just as accurate and having less zoom means you maintain more peripheral view. The choice of class is dependent on the player themselves. If you wish to play as a guerrilla fighter then Assault will keep your ammo stocks high. Using recon will mean you're more dependent on your team, and must stick around assault players, but you will be more efficient at killing enemies due to the amazing abilities of motion mines.
Video Portrait
Courtesy of Dan7
Conclusion
So as you can see, 12. gauge slugs really aren't the 'useless weapons' they're often seen as, and with correct use you will be able to compete with any other class at any range. That's all for this guide, and if you have any questions then feel free to post them in the associated thread. Thanks go out to my co-writer Zm0r who helped immensely with tactics, the specialisation section and in-game testing (as well as the following number crunching). For now however, adieu and happy hunting.