This act will test your ability to multitask in all four corners simultaneously!
A few things to keep in mind:
- You will need power in order to take full advantage of this briefing!
- You do not have a Tiberium storage facility, so spend what you have. If you reach 3000 credits and sit there, then you will be wasting the overflow. You do not have enough Tiberium as it is, so do not waste anything!
- You continue to collect Tiberium during the briefing, so it may be wise to queue up some units while you are in the briefing.
- Railgun technology is at your disposal and I find it helpful to have before Act II (though it is hard to get by then).
- You should have at least three of the Tiberium spikes before this part of the mission or you will not survive!
- I find it very helpful not to have any critical units in the Hammerhead at the time of the briefing. Just a feeling, you will find out why.
Easter eggs
- There is a hidden base on the map, and if you destroy it you are rewarded.
- There are 2 crates for rewards for various items I have mentioned above.
- There are 2 units awarded to you by Act II if you have completed all tasks successfully.
- There are 4 units before the Juggernaut sortie if you arrive at that sortie with at least a decent amount of money in reserve.
Example: B8factor's base
- I had a anti-infantry tower on all four corners supporting a dug-in infantry group at all four corners and a supporting Sniper in each foxhole.
- I had tanks in front of those Foxholes to act as meatshields absorbing fire, and I kept repairing them between attacks.
- I gave units a ride in the Hammherhead until they leveled up and then swapped them out for another squad.
- At my earliest convenience, I captured as many Tiberium spikes as I could. I also captured the tech factory and had Railguns upgrading during the Act II briefing.
- I had 3 Mammoth Tanks and 3 Zone Trooper Squads queued during Act II briefing.
- I captured 2 Tripods in Act I.
- It was very rare that I managed to achieve every easter egg and got all the free units in every game. It is a fine balance to try to get it all.
Opening cutscene
The opening cutscene will give you these instructions:
- You mission objective is to kill the 4 Queen Tripods that are producing the offspring Swarm that was attacking you in Act I. The location is pinged on your radar: 2 Queens east of you, and 2 Queens west of you.
- A ZOCOM squad has captured a orbital device that beams down Tiberium to the surface. They are having trouble deciphering the alien interface. They have discovered how to beam down the Tiberium, but the location coordinates are still difficult to translate. Keep an eye out on your radar, where a sucessful beam-down will cause a ping. The catch is that the aliens will also be seeking resources, and if they accumulate 5000, they will be able to breed a massive army in a short time and overrun your current position. There is a counter on the bottom-left of your screen that is keeping track of how much Tiberium the aliens have harvested. Do not let them get 5000, you will regret it. I have a Zone Trooper Squad specifically for guarding the beam-down locations from the aliens.
- Nod patrols are also out in search of your Harvesters. Do not engage the Nod and alert them of your location. Your goal is to avoid them at all cost. These are delicate times and we need to concentrate on one enemy at a time. Alerting the Nod patrol could bring the wrath of Kane upon you!
- Guard your base during the entire act, as you are still responsible for keeping the Mass Quagulator safe.
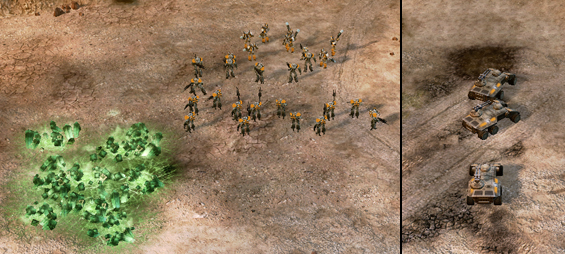 Left: The Tiberium guard. Right: The anti-air group.
 Entering Act II, I had two main hotkeyed groups: 1) The Tiberium guard I mentioned earlier, and 2) a fast acting anti-air group to keep my Harvesters and base free from alien harassment.
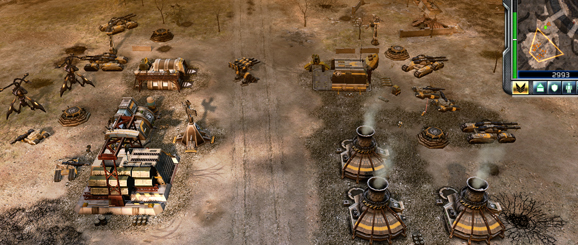 A secured base at the beginning of Act II.
Mission start
Send the Tiberium guard to the location of the first beamed-down Tiberium. Also, keep in mind that the Tiberium Spikes that Nod destroyed prior to Act II will have left-over Tiberium deposits. I made it a priority to observe the location of the beamed-down Tiberium when I get the message that it is coming.
Set up the base so that the defense left over from Act I is now supported with
new troopers purchased during Act I and reserve units produced from the queue during the briefing cutscene for Act II.
I found it very useful to upgrade to Railguns.
Harvesting Tiberium
I was granted the ability to build a Refinery in Act II, so I also felt it was prudent to make a few Harvesters to accumulate Tiberium as quickly as possible. The harvesting in the desert is like in
Dune: harvest up to the last second and get the hell out, before the stealthed Nod patrol stumbles across your Harvesters.
One thing that is difficult to master is the ability to keep the Harvester drivers from wandering into harm's way. I would often have them sit in a protected area until I was ready to harvest. If you allow them to harvest on their own, you are bound to lose them to an attack by either Nod or the aliens.
Fighting the Queens
You have 30 minutes to defeat the 4 Queens. There is a counter on the bottom-left of your screen that is counting down this time. I did not even begin to attack the Queens until 17 minutes into the act. I first secured resources, got my base defenses on auto pilot, and then, once I had the knack down of harvesting, diverted my Zone Troopers and Commando to attack the Queens on the
west side first. I choose these units for their Jump Ability.
Once the west Queens were conquered, I knew the west of my base was no longer threatened, so I moved the majority of my force over the the
east of the map to take out the remaining two Queens.
Spoiler: Spoiler: Upgrades acquired in Act II
- Scanner Packs
- Power Packs
- Railguns
Buildings constructed in Act II
- Additional Power Plant
- Command Post
- Refinery
What to expect from your alien enemy
- From the east and west, each of the 4 Queens will continue to produce offspring that will attack you. Killing a Queen will eliminate some of the attack force.
- From the aliens, scout ships will begin to fly in from sporadic locations and in sporadic intervals all over the map. They are seeking out and protecting the beamed-down Tiberium. They will annoy you.
- Two Nod squads are on the lookout for your base. They will be hard to spot with their stealth technology, so watch out! They will be traveling the main road in the valley. Do not engage these units. If you do, it will trigger a counter attack from the Nod main force... and it ain't pretty!
- If the aliens acquire 5000 credits, they will have had enough Tiberium to produce a massive army that will rain down on you from the north. You will most likely not survive that attack. And even if you do, you will not be in good shape for Act III.
This act is a test of your multi-tasking abilities under the pressure of two counters, a 30-minute timer to complete the mission and the alien's Tiberium counter.