Shield InfoA good line of defense has one or two additional shields besides the Crawler shield, shields provide extra protection for all units and structures inside. Units can't shoot into but they can shoot out of the shield, this applies to both you and your opponent
Here's a list of the shield hit-points from various sources:
GDI Outpost = 300 basic - 600 upgraded
Tunnel Shield (requires upgrade) = 500 basic - 1250 upgraded
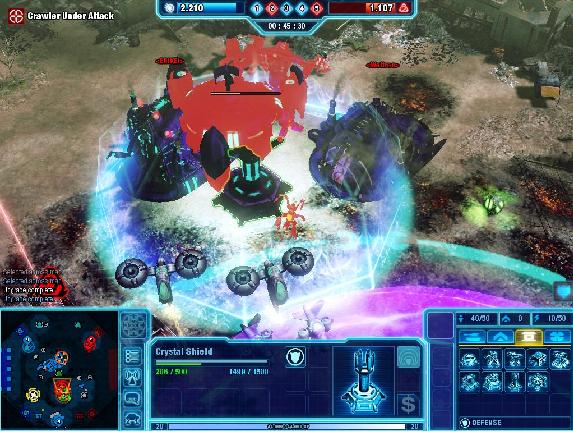
Crystal Shield = 750 basic - 1500 upgraded
Crawler Shield (requires defensive matrix) = 1000 basic - 2000 upgraded
Disruption Tower Shield = 750 basic - 1500 upgraded
shield
A fully upgraded Tunnel has 250 shield points less than Crystal Shields but costs only two power points. The Crystal Shield costs a staggering ten, so build two Tunnels instead if you have the space.
Effective strategies- Defense Stacking
An effective way to quickly deploy defenses in enemy territory is to que up multiple defensive structures and putting them on hold just before they're finished. This will provide you with a large stack of near-ready defenses which allows rapid deployment.
- Patriot System
The GDI Missile Turret and Falcon MLRS are outfitted with the Patriot Communication System, allowing them to shoot anywhere in the radius of uplinked Turrets. To cover large areas with just a few Turrets use the PCS! if a unit enters the area all the turrets will shoot. Follow the green beams emitting from a selected turret to check which turrets are linked to it. They even link to turrets deployed by your allies, so you can use multiple defense players to quickly cover massive areas.
NOD has a similar system with the Obelisk of Light, if a unit enters the area of one Obelisk, nearby Obelisks will charge it up for an extra powered shot. The NOD defensive Crawler is also outfitted with an Obelisk that can be charged this way. - Tunnel Trick
Straightforward but effective, build a tunnel at the crawler near a defensive position of your choosing and one near an uplink tower or allied crawler. Cover both with a few defenses and build a massive infantry force, the tunnels will allow you to instantly travel between them. A perfect way to effectively defend two position at the same time, travel over the whole map for some quick support to your allies or surprise your enemy when your meekly defended position turns out to be a death trap. - Shielding and Stasis fielding
The mobility Matrix allows you to cover allied troops as they move. Make sure to cover your offensive ally as he charges. The Crystal Shield is a special case of shielding, it's stasis shield disables all units inside and prevents any interaction between those inside and outside the shield. Place a Crystal Shield at a choke point your opponent cannot circumvent, and as he's about to move through, activate the stasis field blocking the entire passage! To his great annoyance he'll have to find another route or wait the full duration before he can move through, buying you and your allies valuable time. The Stasis Field will continue working even if you are on low power. If you emit a Stasis Field around a TCN node or other tech structure it can not be captured, however it will continue to accumulate victory points. If a Tower's shield is broken it's faster to sell it and build a new one than to wait for the shield to regenerate, same goes for the stasis field. Don't think about it, just build a new one.
stasis field
The stasis field lasts about as long as the crystal shield takes to build, thus allowing you to keep an enemy Crawler or any other unit frozen permanently by constructing new and selling older crystal shields
 Access denied
- Tick-Tank-Turret
If you face an offensive player going heavy on tanks, build turrets along with spartan tanks and centurions. These beefy tanks can take a lot of punishment while you build up your turret line. Spartan tanks will even turn into turrets when destroyed, now that's effective defense construction! - Dozer bunker
Build a bunker with two or three bulldozers in it or two slaves, these repair units have adjacent range but heal far more than engineers. Deploy defenses adjacent to the bunker and they will receive super heals from the garrisoned healers. This allows you to move your Crawler to the other end of the map without having to worry about your roadblock. To totally finish this strategy, add an outpost that grants build radius for defense replacement and a shield or cloaking field to further strengthen your position. This technique allows you to successfully defend two positions at the same time. - Ambush
As NOD you can upgrade all tier one defenses so they gain the Burrow ability, granting them stealth and armour. Build a bunker garrisoned with a devout near a Blue Crystal spawn point to grab opposing engineers off-guard. Burrow your defenses at a choke point to catch a bypassing army or Crawler by surprise. Your opponent will have a hard time microing against something he didn't expect, this will often lead to an disorganized retreat by your opponent giving you the opportunity to pick off his units. Use a cloaking device to hide higher tier defenses and any units to support your ambush.
stealth
If you plan to cloak your units and defenses with a Disruption Tower in stealth mode, use an upgraded Burrow Tunnel instead, it costs only two power points and has a much larger stealth radius
The improved concealment upgrade improves the stealth radius from the Disruption Tower to match that of the Burrow Tunnel. - Mine Mode
This only works as an opening, at the start, queue up as many dozers/slaves as possible and turrets, preferably rocket turrets. When you meet the opposing crawler, deploy and set all your dozers/slaves on aggressive (hotkey K). Let all of them drop their mines at the exit of the enemy crawler whenever the power recharges. This will instantly kill any unit leaving the crawler and damage the crawler itself. The strong auto heal will prevent you from losing anything. This strategy is best done with GDI since their EMP mines will disable the crawler making it an easy fight, Nod however deals more damage. - Unit mix
It's obvious: build infantry! The defense class isn't specialized in infantry for nothing, your defenses are resilient versus gun damage and weak to laser and blast damage. Infantry on the other hand are weak to gun damage and resilient to laser. A perfect mix! With these units covering each others weaknesses so well you'll be an even tougher nut to crack. - Sell near dead structures
When a defensive structure is killed, it rewards your opponent with victory points like normal units. Contrary to units, all structures have an instant sell button hotkey C. When a structure is about to receive its final blow, quickly sell it to deny your opponent valuable victory points!


